Get the Starter App
Everything from Act 0 on uses one small app, a .NET budget tracker. This step gets it onto your machine and confirms it runs, so the workshop itself can stay about Kiro, not setup.
1. Install the .NET SDK
Section titled “1. Install the .NET SDK”The workshop app targets .NET 10. On macOS, Windows, or most Linux, install it with
dotnetup, the
.NET toolchain manager — it installs and manages .NET at the user level, no admin required. On
Ubuntu, the simplest path is straight from apt.
-
Install the SDK for your platform.
Download and run
dotnetup:Terminal window curl -fsSL https://aka.ms/dotnetup/get-dotnetup.sh | bashFollow the printed instructions to add
dotnetupto yourPATHand restart your terminal, then run it and take the suggested first-time setup:Terminal window dotnetup- Channel: pick
10.0. The workshop app targets .NET 10. - Mode: pick Terminal Mode.
Download and run
dotnetup:Terminal window iwr https://aka.ms/dotnetup/get-dotnetup.ps1 | iexFollow the printed instructions to add
dotnetupto yourPATHand restart your terminal, then run it and take the suggested first-time setup:Terminal window dotnetup- Channel: pick
10.0. The workshop app targets .NET 10. - Mode: pick Terminal Mode.
Install the SDK directly from
apt— no toolchain manager needed:Terminal window sudo apt-get update && \sudo apt-get install -y dotnet-sdk-10.0 - Channel: pick
-
Verify the install (restart your terminal first if you used
dotnetup):Terminal window dotnet --version
2. Clone and run the app
Section titled “2. Clone and run the app”-
Clone the starter repo:
Terminal window git clone https://github.com/dwalleck/kiro-hero-budget-tracker.git budget-trackercd budget-tracker -
Run it once to confirm everything works:
Terminal window dotnet run --urls http://localhost:5000 -
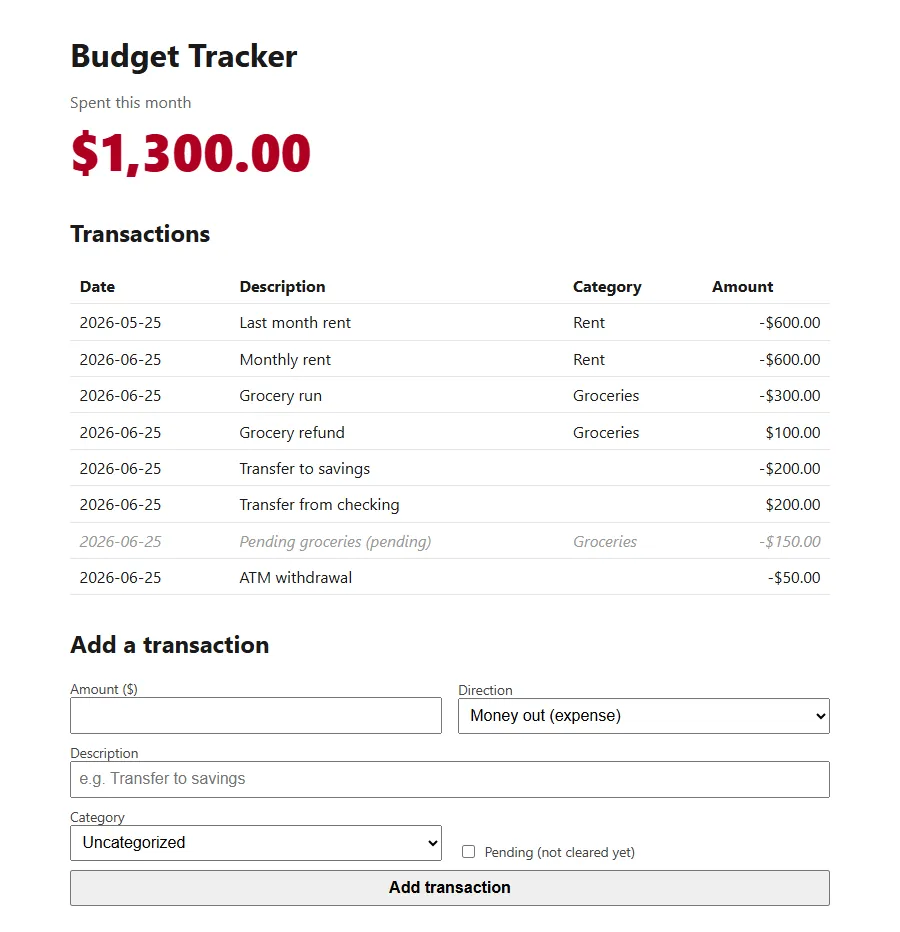
Open http://localhost:5000 in your browser. You should see the dashboard: this month’s spending up top, with the seeded transactions below it.